Thursday, November 29, 2012

DIY Inspiration: Exposed Zippers

I'm loving this funky new trend of Exposed Zippers on clothing.  Certainly looks like an easy, inexpensive DIY, stay tuned for a tutorial early next week!


Cynthia Vincent $198

Alexander Wang $595


Remeo and Juliet Couture $45 (cute way to enhance a boring shirt!)


Serfontaine Jeans $196


Sunday, November 25, 2012

DIY Crochet: Ski Cowl


It's that time of year again! There's a chill in the air and the snow is starting to fall, that can only mean one thing, it's almost time for ski season!

Last year, bored on a road trip I crocheted an extremely ugly yet soft ski cowl, and, I must say it served its purpose on the ski slopes.  This year, I decided I wanted to recreate the cowl in a more pleasing way, and since I had so much free time thanks to hurricane sandy stealing my power for a week, the project was a success.

Here's what I did:
Make a slipknot

chain 60

Attach the last chain to the first chain using the slip stitch

chain 2, *double crochet all the way around, slip stitch, chain 2*
repeat from ** 22 times, or until you reach your desired length


Fasten off


Simple simple project, and comes together in a few short hours (so easy decided to make a few!).


Monday, November 19, 2012

DIY Jeans Refashion: Flares to Straight Leg


I've had this pair of blue cult jeans sitting in my closet for a good two years, but I couldn't bare to part with them because I love the way they fit at the waist and thighs, and the actual jean is so soft!  As the flared jean style is no longer in right now, and these pants actually are a little short for me (just a few reasons why they've been sitting in the closet unworn for so long) I decided it was time to refashion to straight legs!

My first step was research, I wanted to read through other bloggers attempts and see what method I thought would work best for me.
The majority of tutorials showed only altering the inside of the pants, but to me this didn't make much sense beacuse you'd be pulling the jean and might end up with awkward bunches.
I decided the best way to go would be to alter both sides of the jean starting just above the knee
Here's what I did...
Turn your jeans inside out and try them on
Starting above your knee pinch fabric and pin (make sure your jeans are laying flat and you're not pulling the fabric to one side or the other); work your way down your leg moving from right to left; once complete do the same thing to your other leg


Keeping the pants inside out, use a long straight stitch (just in case you mess up you can use the seam ripper to start over) to sew down both sides of the pants; when sewing make sure to start just off the fabric above the knee so the seam is nice and straight


Try on the pants again, if you like the way they fit (left side is altered), turn inside out, cut off excess, and resew using a zigzag stitch.  Do the same process to the other leg.

That simple, new wearable straight legs!

Monday, November 12, 2012

DIY Crochet: Poncho

At long last, I have finally found a great extremely easy crochet poncho pattern! 

I've been wanting to make a poncho since the day I began crocheting, but every pattern looked crazy complicated and wasn't exactly appealing to the eye.  Thankfully lionbrand yarns came through for me for this season.  Check out the pattern I used here.


If you're interested in making this, I would definitely use the lion brand pattern, but if you want to recreate exactly what I've done above, you can use this altered pattern below.
Make a slip knot
chain 73
Row 1: Half Double Crochet (hdc) in 3rd chain from the hook, and in each stitch across
Row 2: *chain 2, turn, hdc in each stitch across* repeat ** until piece measures 50 inches
fasten off


                          Fold piece lengthwise bringing 1st row to meet last row
               Beginning at top right hand corner, slip stitch side edges together for 13 inches
hdc around neck opening join with slip stitch at the beginning chain
*chain 2, hdc in each stitch around, join with slip sitch*
repeat ** until neck cowl measures 8 inches
fasten off


Sunday, October 21, 2012

DIY Sew: XXL to Small Loose tee


 XXL Tee before:


After:


Set out shirt inside out

Place a loose small tee over the XXL tee and trace


Cut


Pin the sides of the shirt


 To get the right size for the sleeves, I used a sleeve pattern from a project I did in the past.


The top is the "before" and the bottom is the "after"


With right side up fold sleeve, pin and sew (do this for both sleeve pieces)


Now you're ready to sew all the pieces together!


Sew up sides first (your shirt should still be inside out).  Turn both sleeve pieces right side out, and insert them into the arm hole (kind of hard to explain, see image below for guidance)
 pin sleeves to arm holes and sew around


Add pocket: cut a 4'' by 4'' square
Fold down top 1/2'' and sew, fold in remaining 3 sides 1/4'', pin on shirt and sew


Sunday, September 30, 2012

Crochet: Detachable 30 Minute Peter Pan Collar


Inspiration:


I know I'm kind of late on the bandwagon here, but I'm absolutely loving the peter pan collar trend.  I figured the easiest way to recreate one would be to crochet.  As per usual I took to google and pinterest to see if there was a free pattern already in existence, and sure enough there was! I read over a few patterns and ultimately ended up making up my own.  See below for pattern.

Materials:
yarn
crochet hook (size k)
darning needle
scissors
tape measure
faux pearl bead

Pattern:
Make a slipknot
Chain until you reach desired length (I chained 60) (To determine desired length I took a tape measure and wrapped it around my neck)
2nd row: DC (double crochet) in 4th chain from the hook, dc in every stitch after
3rd row: chain 3, dc in 1st stitch *skip 2 stitches, 4 dc in 3rd stitch* repeat *to* until you have one stitch left, in last stitch 2 dc
4th row: repeat 3rd row, except for the last stitch, in last stitch dc
Finishing: using your darning needle weave in ends, leave a few inches of yarn, thread the pearl bead and weave in the remaining yarn


Monday, September 24, 2012

DIY T-shirt Refashion: Peplum


I've been seeing peplum shirts everywhere lately, and I'm dying to get my hands on a few.  Unfortunately every time I try one on the peplum doesn't seem long enough, and I end up with a belly shirt (not cute!).  I decided there was no other way to get exactly what I wanted then to make it myself.  Now.. how do I do that?
I set out to see if any fellow crafters have already attempted the peplum without a pattern, and sure enough many have!  I found this tutorial to be the best!

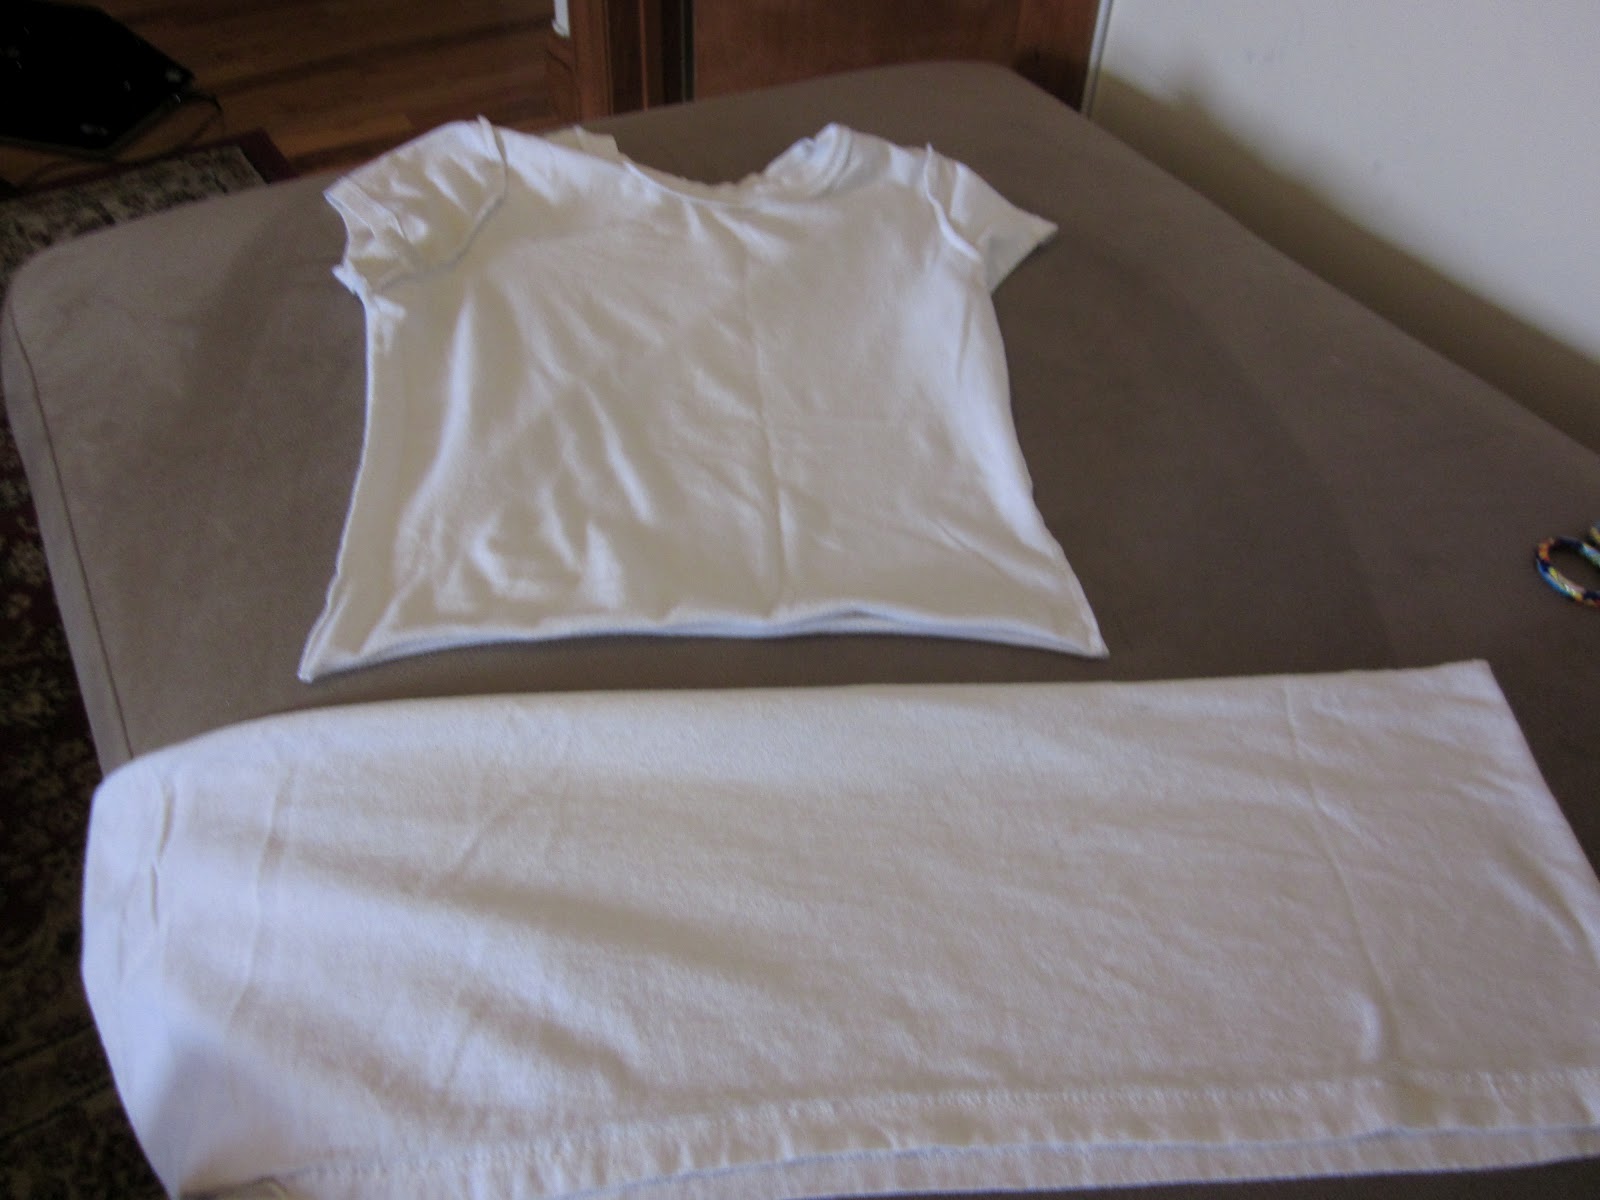
I started out with two shirts I never wear, the first one a fitted stretch tee, that I don't wear because it's too fitted at the tummy, and the second a large baggy tee:


First I tried on the fitted tee and decided where I wanted the peplum to start, I decided right above the navel, so I marked there.  I then took a ruler and marked across the entire shirt

cut
I tried the top on again and then using a measuring tape I decided how long I wanted the peplum to be; 8" seemed to be just the right length for me, allowing the pelum to fall just over the top of my jeans.
I took the baggy shirt, laid it out, I measured 8" from the bottom and marked across, then cut


I was left with these two pieces
Now, to attach them, I turned the bottom portion inside out (the hem should be at the top), and I slipped the top part of the shirt into the bottom, and pinned all the way around
Using a straight stitch I sewed all the way around, and that's it!
Fold down!