Sunday, October 21, 2012

DIY Sew: XXL to Small Loose tee


 XXL Tee before:


After:


Set out shirt inside out

Place a loose small tee over the XXL tee and trace


Cut


Pin the sides of the shirt


 To get the right size for the sleeves, I used a sleeve pattern from a project I did in the past.


The top is the "before" and the bottom is the "after"


With right side up fold sleeve, pin and sew (do this for both sleeve pieces)


Now you're ready to sew all the pieces together!


Sew up sides first (your shirt should still be inside out).  Turn both sleeve pieces right side out, and insert them into the arm hole (kind of hard to explain, see image below for guidance)
 pin sleeves to arm holes and sew around


Add pocket: cut a 4'' by 4'' square
Fold down top 1/2'' and sew, fold in remaining 3 sides 1/4'', pin on shirt and sew


Sunday, September 30, 2012

Crochet: Detachable 30 Minute Peter Pan Collar


Inspiration:


I know I'm kind of late on the bandwagon here, but I'm absolutely loving the peter pan collar trend.  I figured the easiest way to recreate one would be to crochet.  As per usual I took to google and pinterest to see if there was a free pattern already in existence, and sure enough there was! I read over a few patterns and ultimately ended up making up my own.  See below for pattern.

Materials:
yarn
crochet hook (size k)
darning needle
scissors
tape measure
faux pearl bead

Pattern:
Make a slipknot
Chain until you reach desired length (I chained 60) (To determine desired length I took a tape measure and wrapped it around my neck)
2nd row: DC (double crochet) in 4th chain from the hook, dc in every stitch after
3rd row: chain 3, dc in 1st stitch *skip 2 stitches, 4 dc in 3rd stitch* repeat *to* until you have one stitch left, in last stitch 2 dc
4th row: repeat 3rd row, except for the last stitch, in last stitch dc
Finishing: using your darning needle weave in ends, leave a few inches of yarn, thread the pearl bead and weave in the remaining yarn


Monday, September 24, 2012

DIY T-shirt Refashion: Peplum


I've been seeing peplum shirts everywhere lately, and I'm dying to get my hands on a few.  Unfortunately every time I try one on the peplum doesn't seem long enough, and I end up with a belly shirt (not cute!).  I decided there was no other way to get exactly what I wanted then to make it myself.  Now.. how do I do that?
I set out to see if any fellow crafters have already attempted the peplum without a pattern, and sure enough many have!  I found this tutorial to be the best!

I started out with two shirts I never wear, the first one a fitted stretch tee, that I don't wear because it's too fitted at the tummy, and the second a large baggy tee:


First I tried on the fitted tee and decided where I wanted the peplum to start, I decided right above the navel, so I marked there.  I then took a ruler and marked across the entire shirt

cut
I tried the top on again and then using a measuring tape I decided how long I wanted the peplum to be; 8" seemed to be just the right length for me, allowing the pelum to fall just over the top of my jeans.
I took the baggy shirt, laid it out, I measured 8" from the bottom and marked across, then cut


I was left with these two pieces
Now, to attach them, I turned the bottom portion inside out (the hem should be at the top), and I slipped the top part of the shirt into the bottom, and pinned all the way around
Using a straight stitch I sewed all the way around, and that's it!
Fold down!


Sunday, August 19, 2012

DIY Sew: Rectangle Top

Summer weather calls for casual loose clothing, I saw these pins on pinterest via seamsforadesire, and knew I wanted to try to recreate the summer look:


First figure out what the measurements are by measuring elbow to elbow (34'') and shoulder to mid thigh (30'')


Use a ruler and a disappearing pen to map out the measurements onto the fabric (make sure you fold your fabric in half with good sides touching; you'll probably need about 2 yards of stretch knit fabric)

Cut, then pin and sew up the sides (where the sketch is marked in red)


Lastly, measure 3'' from the center and bottom of shirt and cut in a semi-circle


Wear!


Monday, July 23, 2012

DIY Sew: 1 yard Knit Dress


The challenge: I had exactly 1 yard of knit fabric that I had no idea what to do with.
After making a rectangle top (I'll post soon), I thought I could try the same with this fabric; unfortunately due to the stiffness of the fabric, the shirt turned out really boxy and unattractive. 
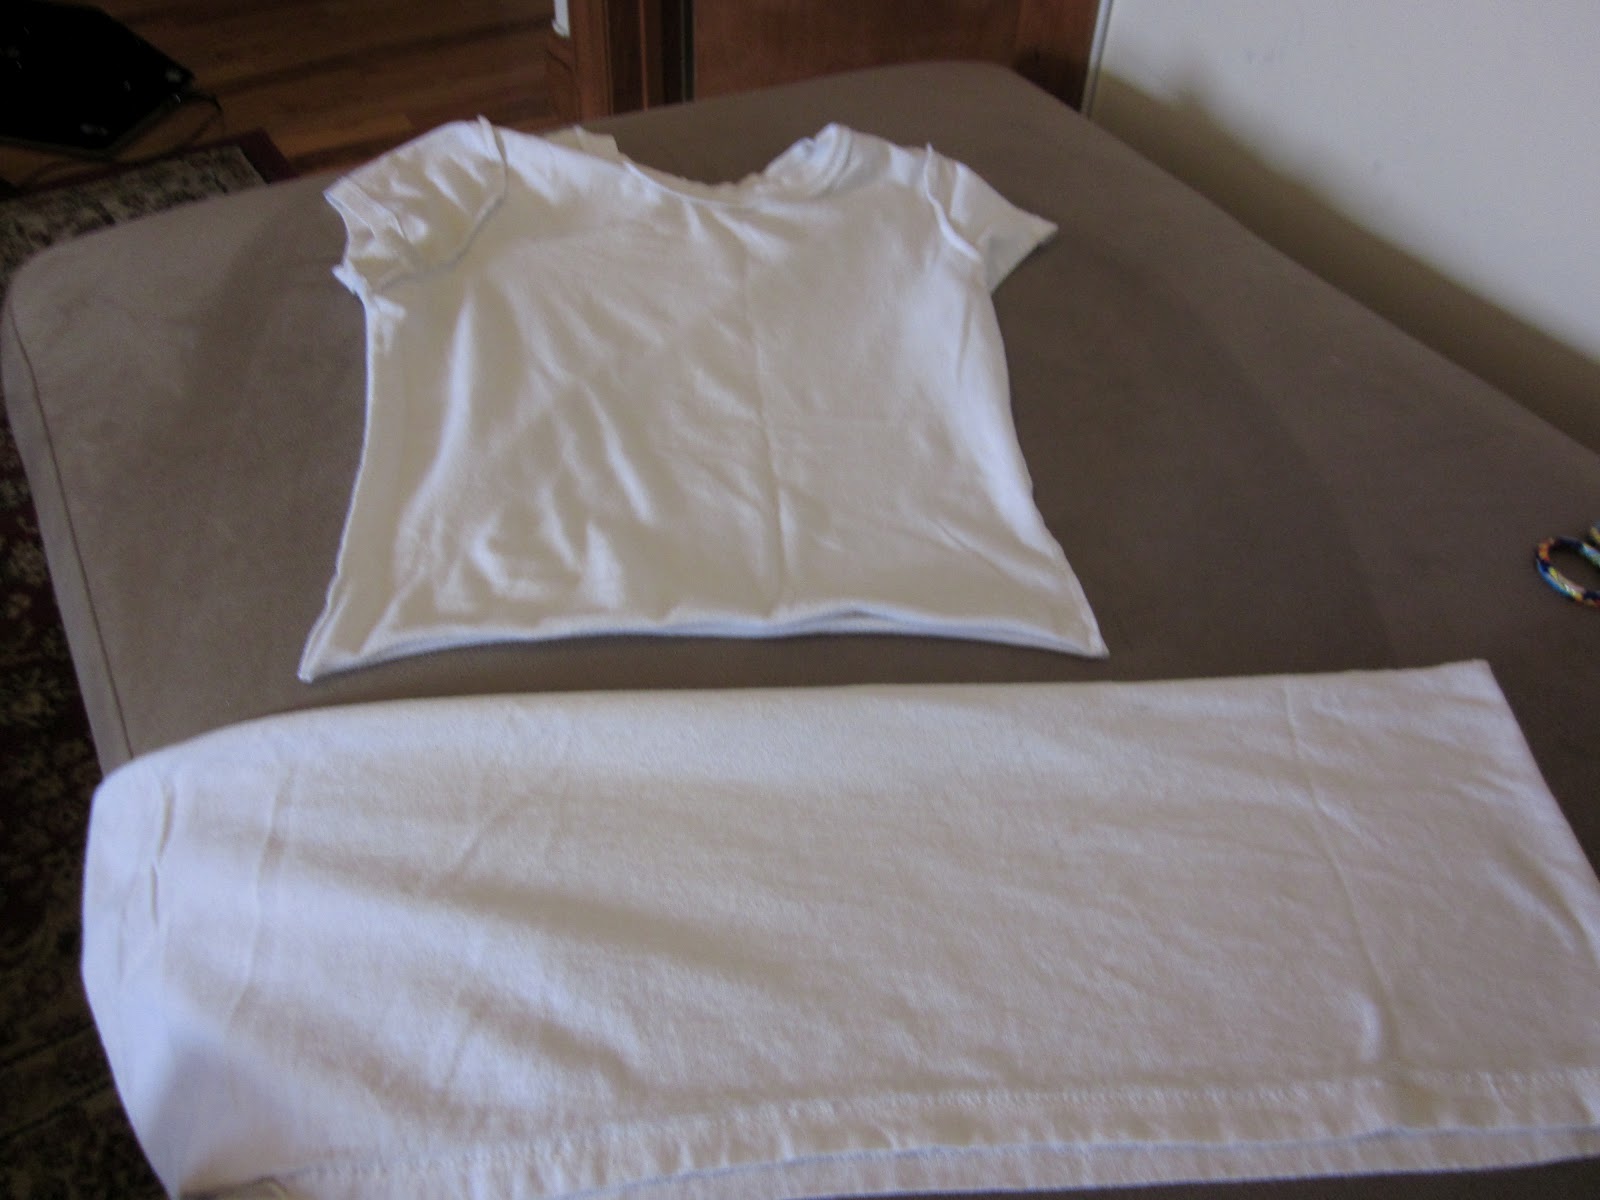
I put the project to the side for a day, and then figured I would attempt to make a three quarter sleeve shirt out of it; I grabbed an old shirt from my dresser and traced.  After tracing, I realized I had some extra fabric, so I flared out the bottom with the thought that it might make a cute tunic.
When I tried the shirt on, I realized it could work as a dress, although at this stage it was super short, and I needed more length.  I decided to use my fabric scraps to extend the dress a few inches; and that was that, the dress was born!

If you're interested in attempting, here's what you'll need
1 yard of fabric (http://www.thefabricfairy.com/)
matching thread
scissors
sewing machine
pins
long sleeve shirt (for tracing)


Lay out your fabric with right sides touching; place your shirt on top and trace


Add the a flare to the bottom


Cut; pin up the sides, and sew using a zigzag stitch


Turn the dress right side out; At this point I tried on the dress and it was too short, so I grabbed some fabric scraps, and cut two identical pieces; then with right sides of fabric touching I pinned on the fabric to the front; then I used my second piece and pinned it on the back
Sew the fabric on horizontal first; after that's done, sew up the back and front sides together at the side seams


Last hem the bottom and the sleeves (unfourtnately these pics are pre-hem)

That's it, COMPLETE!!


Saturday, July 14, 2012

DIY Cobra Bracelet


After stumbling upon this awesome etsy bracelet shop, I decided I had to have one for myself.

I had such great memories of making cobra bracelets in girl scouts, I thought, what fun would it be to purchase a bracelet when it looked feasible enough to make on my own.


First I had to gather the materials, I picked up a valuepack of craftlace at walmart (around $10); next I needed the right chain, I purchased this at toho shoji in midtown manhattan (note: this is sold by the foot, but it's close to impossible to cut the chain yourself, so ask the sales clerk to cut off exactly how many links you need)


Once I had all materials collected, I enlisted help from my sister, and the two of us brushed up on the cobra pattern using this youtube tutorial.
After some trial and error we felt confidant we were ready to incorporate the chain

For our bracelets we used 6 links of chain, to begin we strung 2 long pieces of lanyard into the first chain, and then cobra stitched (using the youtube tutorial) until the bracelet was long enough for our wrists.


Once the bracelet was long enough we tied a knot at the end


Finally, we cut off excess lanyard, and melted the knot slightly using a flame.

Finito!


Sunday, July 8, 2012

Pattern Review: Simplicity E1961

Simplicity E1961 Pattern Review


I love the look of draped cardigans, and when I started sewing, I knew this was a project I wanted to tackle. I found this pattern for $3.


I must admit, I never actually followed a pattern on my own before so this took me an afternoon, but I'm sure if you have a little pattern reading experience this will be a sinch!

First I had to pin the pattern to my fabric and cut, this was a challenge!
Once all my fabric was cut, the project was fairly easy
I only took one picture making the cardi, because I really wanted to focus.

All in all this was a pretty managable project for a beginner; if you're interested in sewing one up for yourself the pattern is available on ebay.

I must say, I was happy with my finished product, and I'll definitely be making more in the future!


tied!