Tuesday, October 22, 2013

DIY Sew: Decorative Couch Pillow

This week's tutorial continues on last week's theme, revamping small elements in your apartment/home easily and on the cheap.
What better way to add some warmth to a room than to make colorful decorative pillows.
 
Here's what you'll need:
fabric
12'' zipper
matching thread
seam ripper
scissors
sewing machine (optional)


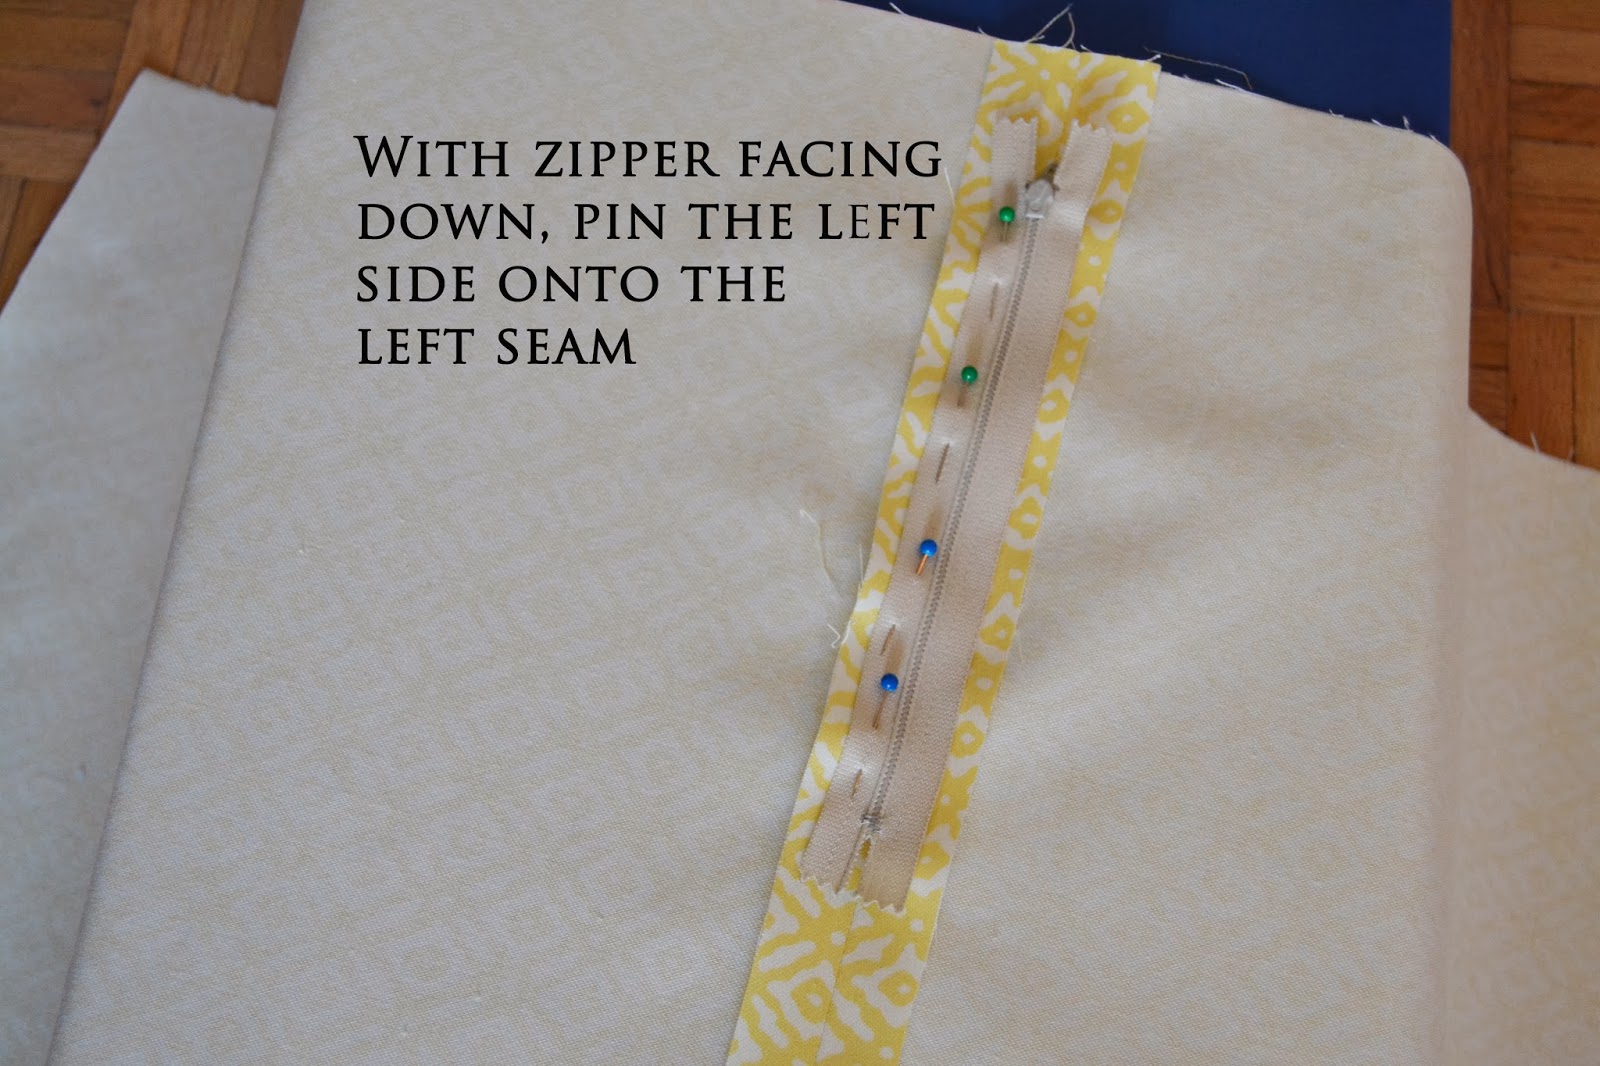
sew zipper onto the seam (use zipper foot if you're using a sewing machine)


Monday, October 14, 2013

DIY Blanket Headboard


Recently I decided it was time to make some changes in my bedroom.  I wanted to create a focal point in the room and thought that a head board would be just the element I needed.  Wanting to create something that wasn't bulky or expensive I thought draping a throw blanket over a curtain rod would work perfectly.
 
Here's what you'll need to recreate your own:
Throw Blanket
Curtain Rod
Curtain rod brackets
Hammer
Nails
level
 
Step 1: Decide on placement of your curtain rod
Step 2: Nail in brackets
Step 3: Drape blanket over the curtain rod

Done!


Tuesday, October 8, 2013

DIY Sew: Neon Mesh Skirt


I know I'm months, even seasons behind on the neon trend; but hey style is personal right? I can wear what I want when I want.  A few weeks ago I set out to my favorite fabric store GEM and to my sad surprise the store was closing, the silver lining was the closeout sale.  I came across some neon mesh fabric, I think it was $2 a yard, I figured it was a bit unconventional but it would do the trick for the neon skirt I've been wanting to make.  Of course there are challenges with mesh... it's see through, ahh! I quickly realized it'd be easy to double up on the fabric and I could either create a lining, wear a slip, or in the case above slip on over a bodycon dress.

Here's how I made it:


 for more details on how to insert darts, see tutorial here
 
sew in zipper, then unzip zipper, use seam ripper to rip open seam under zipper
 
 
Hem (optional)

Thursday, September 26, 2013

Ombre Nails


I wish I could say that I painted my nails myself, or that I have a great DIY ombre nails tutorial for you, but unfortunately I cheated and got these done at a salon.  If you're in nyc and want to try it out, I went to Valley Nails;  however, if you are feeling crafty and want to try the ombre look yourself, check out these tutorials:


Tuesday, September 17, 2013

DIY Sew: 1/2 Circle Skirt

 
I was over on WhoWhatWear.com the other day and came across an article about 10 Must Try Outfit Ideas. My favorite outfit idea and also the one I was most excited to try to DIY was this one below: Thin Wool Sweater and Circle Skirt.  This is totally DIYable right? Well I was aching to find out, so, as usual I began to do some construction research.
 
As you can see from the first picture I decided to make my circle skirt a mini. 
See below for tutorial & materials list:
 
Here's what you need to get started:
1.5 to 2 yards of knit fabric
matching thread
sewing machine
scissors
fabric chalk


 Cut pattern pieces out


You'll notice after cutting that you'll need to sew up one side of the skirt


DONE!
 

Monday, September 16, 2013

How to: Draft a 1/2 Circle Skirt Pattern


I've been dying to make myself a circle skirt lately, I love the relaxed flowy look, and think it would be a perfect addition to my fall wardrobe.  There's only one minor thing that's standing in my way of sewing the actual skirt..... the pattern...I don't have one, but surely I can figure out how to draft one myself. 

Here's how it all went down:
First I gathered my materials:
Craft paper
measuring tape
pen
scrap paper and calculator
 
Calculate the radius of your waist.  This is achieved with the following formula:

radius= waist/3.14/2
**when sewing with knits you'll have to subtract 3'' from your waist before plugging the waist number into the above formula.  Use the below formula for knits only.
radius(for knits)= (waist-3)/3.14/2


In the below formula 2r-.5'', r= radius; note 18'' below represents how long your skirt will be minus 1 inch (the extra inch is accounting for the hem), if you'd like your skirt shorter or longer, adjust this number.


Lines A to B, and A to D should be the same length, each line =2(radius)-.5''
Lines B to C and D to E each measure 18''


Cut out the waistband and skirt pattern pieces and now you're ready to create your skirt!

Check back tomorrow for a picture tutorial of my version!


Thursday, September 5, 2013

NYFW: BCBG MAXAZRIA

By some strike of luck this morning I got to go to my very first fashion show... and in case you didn't realize, it's New York Fashion Week!! I showed up to Lincoln center a half hour early and sat around the fountain, taking in the beautiful stylish people around me. I was so fascinated with the whole scene, there were photographers everywhere, asking for street style snaps from the stylish attendees. As I sat people watching, a Marie Claire editor approached the girl sitting next to me and asked if she'd like to be in their street style column! The girl was so unassuming, I'm actually not even sure if she was there for the show or just passing through the square. Later, when I met up with my friend to go inside, we were stopped for a photo (!), I couldn't believe it, I think it was more for his style than mine, but I'll take it! (Check out the fashion week pics from the photographer, he was representing mobella blog here) Once inside I got to hang in the style lounge for a few minutes until the show began seating; I was then escorted to my seat and saw a real fashion runway for the very first time! Scanning the seats my eyes came across Fashion Police Hosts Juliana Rancic and George Kotsiopoulos, and then to fashion icon/model/host Heidi Klum! When the show started I was captivated by all the BGBC Maxazria looks, the confidence of the models, music and design, it was a really powerful, and inspiring experience.
 
Here are a few pics I took..


And here are my favorite looks I grabbed from Style.com:


My mind is racing with ways to DIY these looks, are you inspired?